
Drawing Waterproofing Details That Work on Site
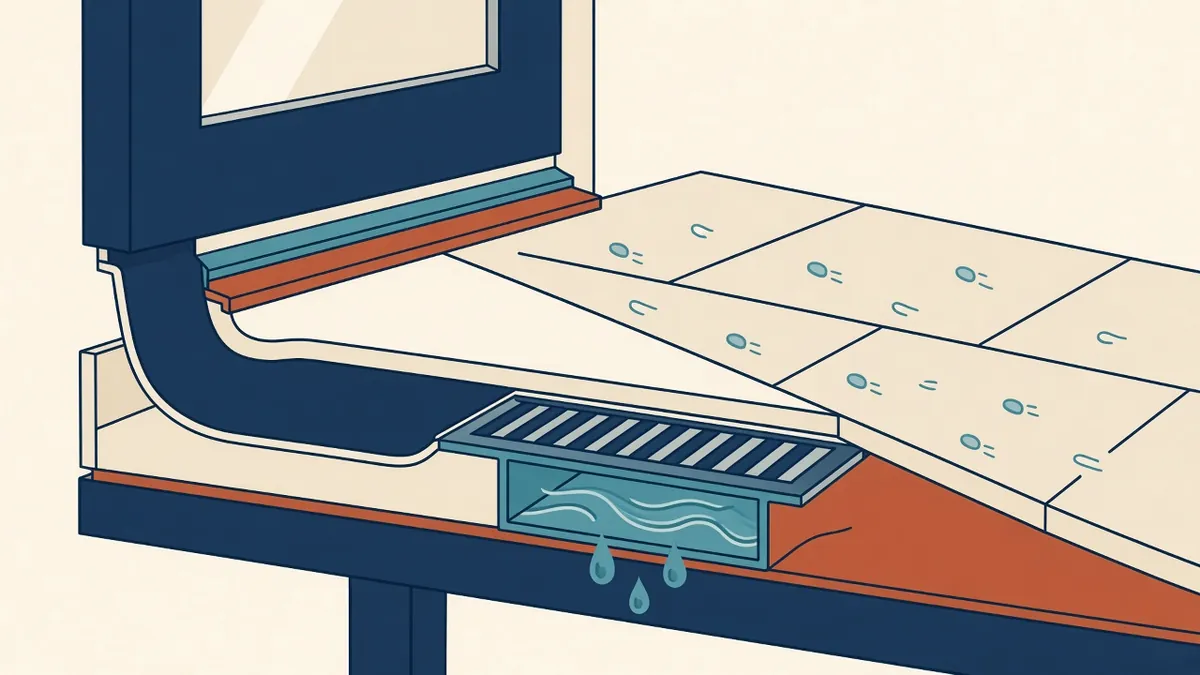
Waterproofing that works on paper and fails on site usually fails at the same few places: laps, upstands and penetrations.
Water finds every gap. Waterproofing details are where the design team shows how the building keeps it out, at basements, roofs, terraces, balconies and wet rooms. Clear details reduce the risk of leaks, which are among the most common and costly building defects.
Principles
- Continuity: the waterproofing layer must be unbroken, or deliberately lapped and sealed at joints
- Upstands: membranes must turn up high enough at walls, doors and penetrations
- Falls: water should drain away from vulnerable points
- Protection: membranes need protection from damage during and after construction
- Compatibility: materials that meet must be compatible with each other
Basements
Below-ground waterproofing depends on the groundwater conditions and the intended use of the space. In the UK, BS 8102 sets out principles for protecting below-ground structures, including types of waterproofing protection. Specialist waterproofing designers are often involved. Details should show membranes or systems, joints, penetrations and how the system ties into above-ground waterproofing.
Roofs and terraces
Show the membrane at outlets, parapets, upstands, thresholds and penetrations. Terraces over occupied spaces need particular care at door thresholds, where finished floor levels and membrane upstands often conflict.
Wet rooms
Showers and wet rooms need waterproofing beneath tiles, with falls to drains and upstands at walls. Show the tanking system and how it meets the drain and door threshold.
Use manufacturer details
Waterproofing systems come with manufacturer details and installation requirements. Base project details on them, and make sure the specified product matches the detail. Avoid mixing systems from different manufacturers at junctions unless they're confirmed compatible.
Draw the junctions
Most leaks happen at junctions: wall to floor, roof to wall, window to wall, membrane to drain. Draw every typical junction, and don't rely on the contractor to invent them.
Annotation
- Name each layer and reference the specification
- Show lap dimensions and upstand heights
- Note sequencing where it matters
- Highlight critical points
Check with a coloured pen
Trace the waterproofing line through each detail. If it stops without being sealed or lapped, water can get through.
Coordinate with other details
Waterproofing details must align with wall sections, roof plans and structural details. A membrane shown in one detail but missing from a related one creates confusion on site.
Think about testing and inspection
Some waterproofing can be tested before it's covered, such as flood testing of wet room tanking or electronic leak detection on some roof membranes. Where testing is planned, note it in the specification and allow for it in sequencing. Inspection before covering is far cheaper than finding a leak after finishes are installed.
If your team needs extra production capacity for work like this, take a look at our Architectural production services, or tell us about your project.
Related articles

Roof Plans and Roof Drainage Documentation
Falls, outlets, overflows and upstands shown clearly on one drawing.
Read more →
Wall Sections Explained: What to Show and Why
The drawing that ties plans, elevations and details together.
Read more →
Architectural Detailing Best Practices for Construction Documents
How to draw details that contractors can build from, without ambiguity.
Read more →